Video Library
Watch the How-to Videos for the quickest way to get started with MathsOnline.
Teacher User Guide
Designing the Curriculum
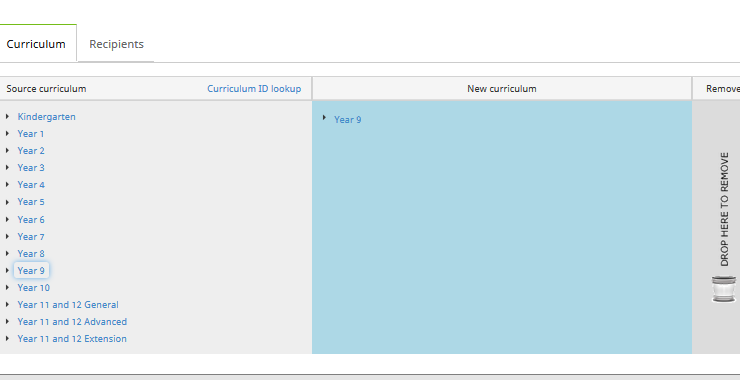
From the main Curriculum Designer screen, select ‘+ Design curriculum’. A new page opens. On the left-hand side is the national curriculum, which contains the full suite of lessons you can use in the construction of a new curriculum. On the right-hand side is a blank canvas upon which to construct your curriculum.
To create a new curriculum, start by identifying the course which contains most of the lessons for the new curriculum. Continuing the example of constructing a 'Year 9 Custom Curriculum' for a particular Year 9 class, we identify the ‘Year 9’ course as containing the lessons required for this class. Accordingly, we drag and drop the ‘Year 9’ folder onto the RHS box.
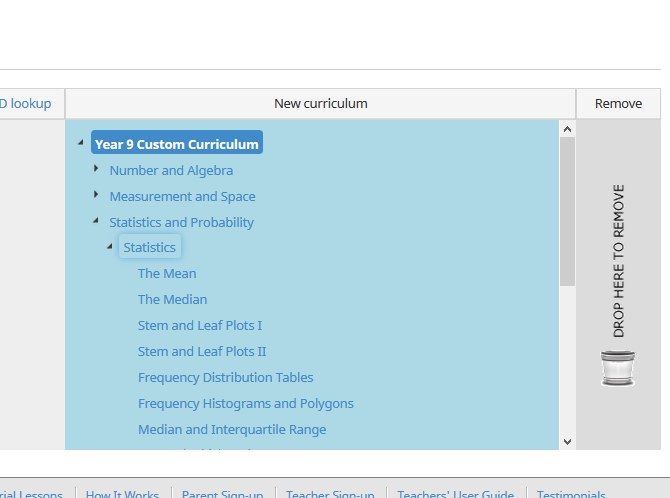
The curriculum can be renamed by double clicking on the title. Then expand the folder and make the required changes to the course. You can change the title of any folder or lesson, reorder the lessons by dragging and dropping into new positions, or remove unwanted lessons by selecting them and dragging them to the bin.
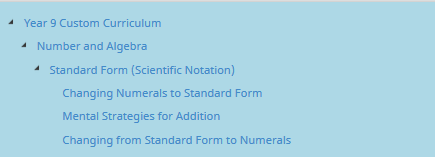
Lessons from other courses, such as Year 8, can be added to the new curriculum by expanding the folders in the left-hand box and dragging the lessons into the new curriculum.
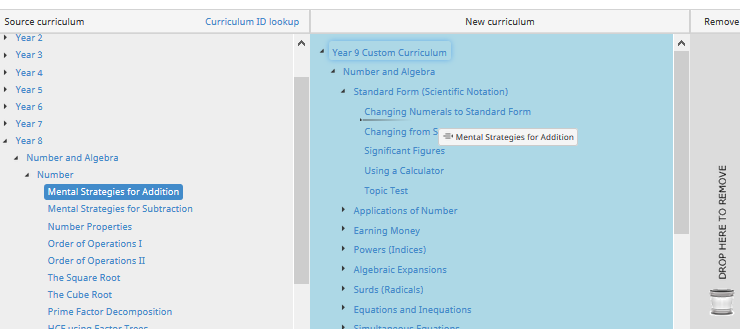
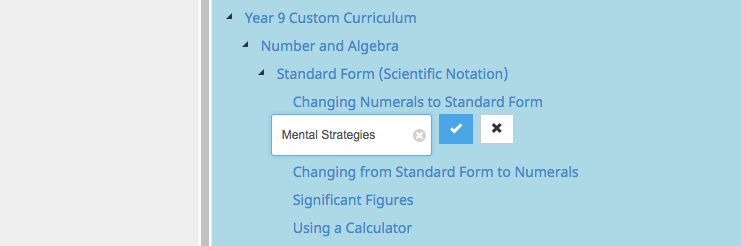
To change the name of a lesson, double-click on the lesson name. To save the new name select the blue box on the RHS of the text box.
The Rollover Guide For A New School Year
If you used MathsOnline in 2023 you DO NOT need to register your school again for 2024. Follow one of the methods below to rollover your classes for 2024.
New schools please register here and instructions will be emailed to you.
Method 1 Recommended
Send to MathsOnline a new and complete list of students and teachers. This will overwrite all existing students and teachers.
Advantages:- Greatly simplifies rollover process. Download, populate and return the spreadsheet to MathsOnline and we will process your student and teacher rolls for you in one business day.
- Removes existing student results so students start the new year with a clean slate.
- After MathsOnline processes your school roll, new logins and passwords will need to be distributed to students and teachers.
Method 2
Using the tools within the Teachers’ Area, manually roll over teachers, classes and students.
Advantages:- Students and teachers keep their logins, passwords, and results.
- A more tedious rollover method, as each class needs to be rolled over manually, students that have left must be identified and deleted, and students and teachers entering the school need to be added.
View Method 2 Instructions

Downloads
Teacher User Guide
Download Teacher User GuideAdd Students to School Template